ShadowrocketSubscription Setup and Connection
Complete the initial setup in this order: add → choose a mode → connect → verify. Check the result at each step before moving on. If something goes wrong, there is no need to change every setting at once.
Reading order: if you have a subscription URL, start with Subscribe; if you only have individual server parameters, go to Add Server; if you have already imported your details, skip to Global Routing.
STEP 01 · Add existing details
Import with Subscribe or Add Server
First identify whether you have a subscription URL or connection parameters for an individual server. A subscription usually represents a group of servers maintained by a service provider, so the list may change when it is updated. Individual server details must be saved one at a time. There is no need to use both methods for the same server; duplicate records can make later testing harder to follow.
Import a subscription URL with Subscribe
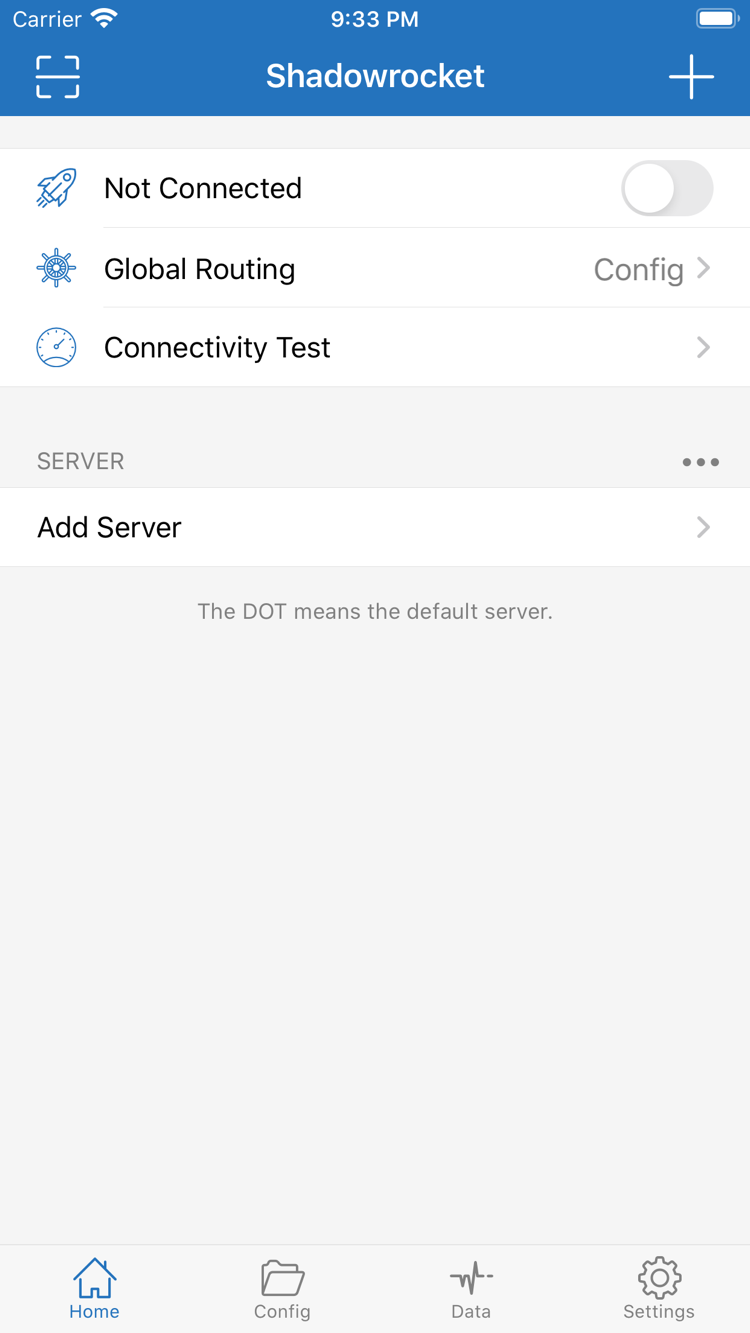
Go to Home, tap Add Server or the add control in the upper-right corner, and open the Add Server page. Tap Type, select Subscribe, then paste the complete URL obtained from your service provider into URL. Use Remark for a name you can recognize; do not enter an account password there. Confirm the details, tap the page’s save button to return to Home, and wait for the subscription fetch to finish.
Copy the entire URL from beginning to end, paying particular attention to characters in the query parameters. Do not paste a service provider’s web page address, explanatory text, or line breaks into URL. The example below is for formatting reference only; it cannot be used to connect and does not need to be opened in a browser.
https://example.com/sub?token=xxxxAfter saving, check the SERVER group for server records under the subscription. A subscription name with no servers does not mean the import is complete. Check for a fetch error first, then ask your service provider whether the URL is valid and whether a specific subscription format is required. Do not keep switching Global Routing while the subscription has not fetched successfully; routing modes cannot fix a subscription download problem.
Enter details for an individual server with Add Server
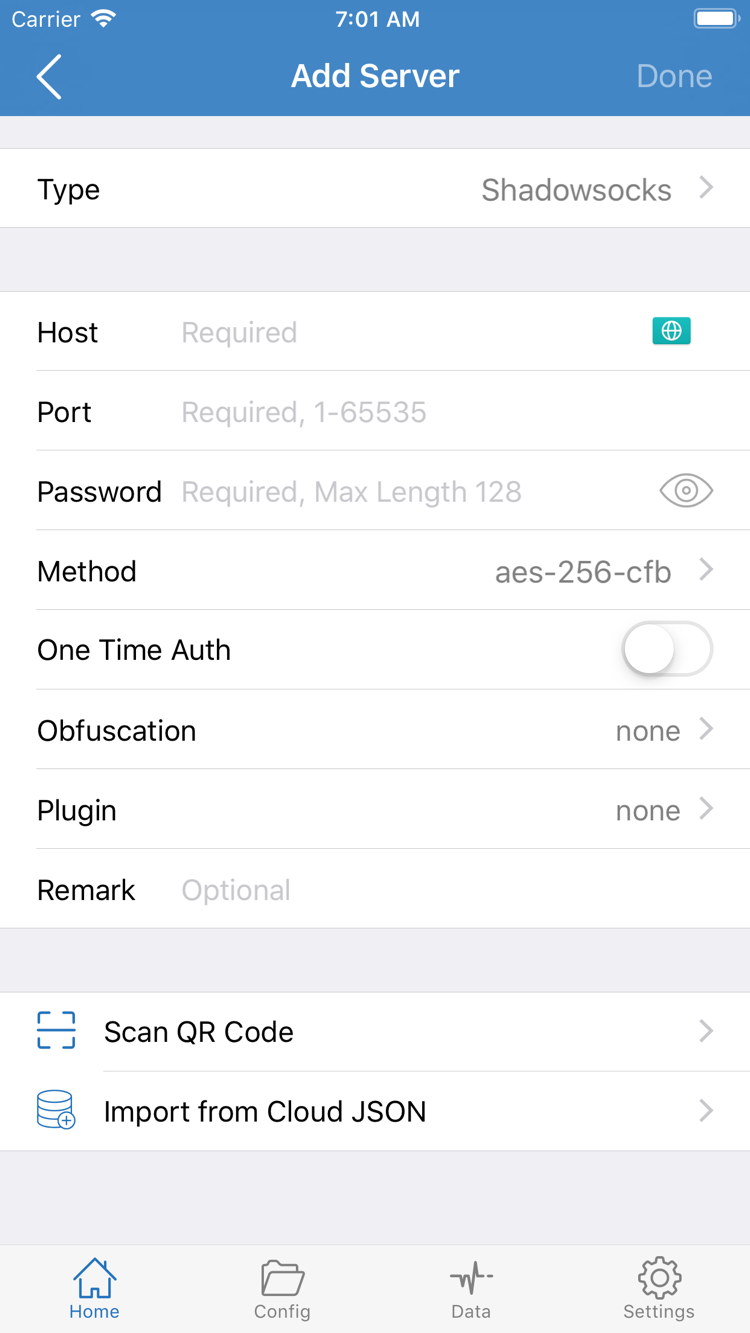
If you have details for an individual server, select the matching protocol under Type, then enter Host, Port, and the authentication details required by that protocol. Password and Method in the screenshot correspond to the selected type; the fields may differ for VMess, VLESS, or Trojan. Do not change the protocol to make the form look more like the screenshot. Use the address, port, password, and other parameters provided by your service provider.
Review the details before saving: Host should not include explanatory text, Port must match the server information, and the password should not have extra spaces at either end. If the details include TLS, a server name, or transport parameters, enter them as provided. If a required field is missing, get the complete information instead of guessing a value.
Add a server by scanning a QR code
If you have a server QR code, use Scan QR Code to read it and allow camera access when prompted. After scanning, check the recognized Type, Host, and Port before saving the record. A QR code may contain complete authentication details, so do not share it publicly. Import from Cloud JSON is another import option. Use it only if you have data in the matching format; do not enter an ordinary subscription URL there.
Step complete: A selectable server appears in the SERVER group on Home. Next, confirm how traffic should be handled before turning on the connection switch.
STEP 02 · Choose how traffic is handled
Three Global Routing modes
Global Routing determines how requests are handled; the server list determines which server handles proxy requests. These are separate settings. Return to Home and tap Global Routing to check the current selection. For everyday rule-based routing, choose Config, then check which configuration file is active in Config.
Config: apply rules to requests
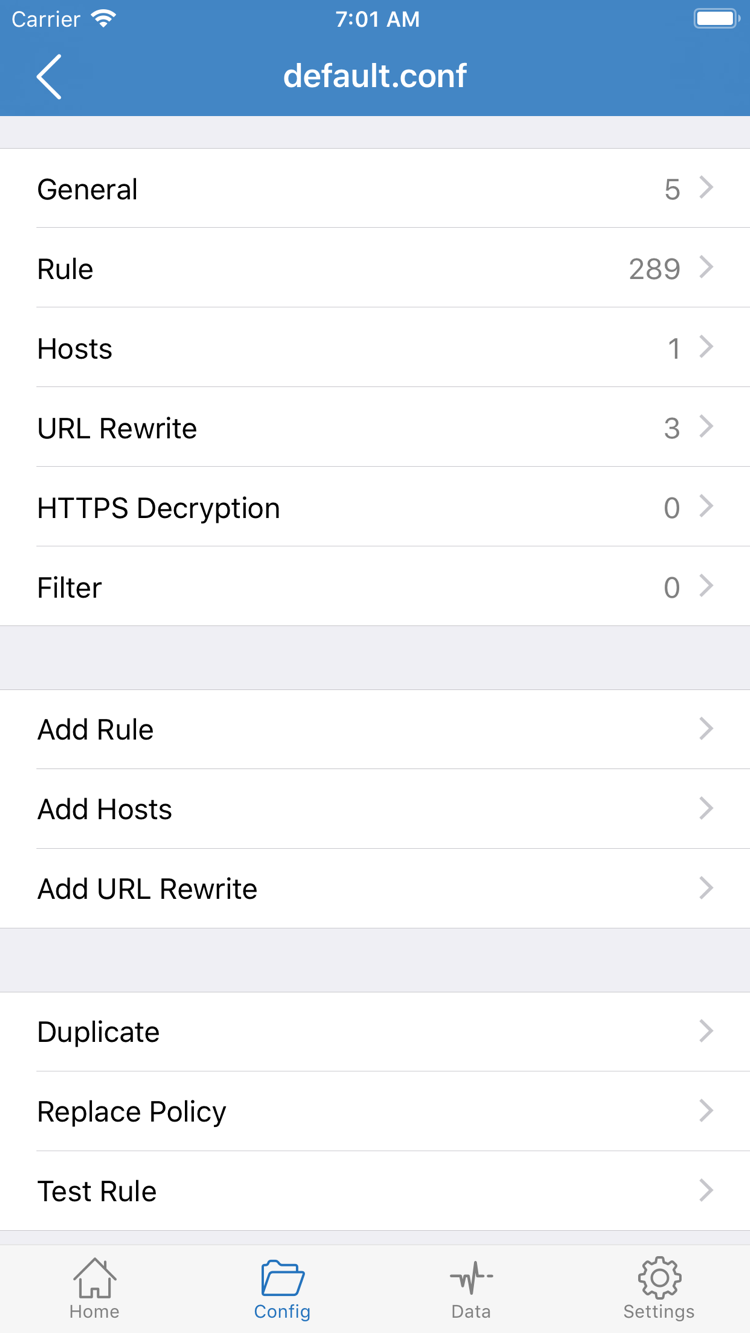
Config handles requests according to the active configuration file. Open Config, check that the expected file is in use, then view its contents. General, Rule, Hosts, URL Rewrite, and HTTPS Decryption in the official screenshot are separate settings sections. When starting out, focus on Rule. You do not need to change other sections or enable HTTPS Decryption just to connect.
Rules in Rule are usually matched in order, and the corresponding policy is applied when a rule matches. The example below sends example.com and its subdomains through PROXY; the final line handles requests that did not match earlier rules. This snippet explains the syntax. It is not a complete configuration file to replace your existing one; a working configuration also needs the relevant policies and other required content.
DOMAIN-SUFFIX,example.com,PROXY
FINAL,PROXY
PROXY, DIRECT, and REJECT represent different handling policies; they are not server addresses. When adding a rule, check that its target policy exists in the configuration and pay attention to the rule’s position. After adding a rule with Add Rule, it may never match if it comes after a rule that already covers the request. Understand the existing rules first, then make the smallest necessary change.
Proxy and Direct: use them for a clear comparison
Proxy routes requests through the proxy in that mode and can be useful for temporarily checking whether the selected server works. Direct provides a direct-connection comparison; it does not mean the request has gone through a proxy. If a page works in Proxy but only certain pages fail in Config, check the rules and policies before removing the server. When testing is complete, return to the mode you need for everyday use so you do not leave a temporary selection in place.
Step complete: You can identify whether the current mode is Config, Proxy, or Direct, and know which file Config uses. For a fuller explanation of rule routing, see Rule-based routing. For more complex issues, continue to Troubleshooting; this guide proceeds to the initial connection.
STEP 03 · Connect and authorize in the system
Select a server and connect from Home
Return to Home and select a server in the SERVER group. Check that the selection indicator is on the intended record. If there are multiple subscription groups, verify the group name to avoid selecting an older imported record. Use just one server for the initial test and avoid switching repeatedly, so you can relate the test results to specific settings.
Check Global Routing again, then turn on the connection switch at the top of Home. The first time you connect, the system asks whether to allow a VPN configuration to be added. Review the prompt, allow it, and complete any password or identity verification required by the device. This step adds the configuration needed for a system connection; it does not import a server or fill in subscription details.
After authorization, return to Shadowrocket and check whether the top still shows Not Connected and whether the switch stays on. If the connection is still inactive, look for a specific permission or configuration error. Do not rely only on whether a VPN indicator appears in the system status bar. If you previously denied authorization, start the connection again and complete the system prompt. If the prompt does not appear again, check the VPN entry in system settings.
If another network tool on the device is establishing a tunnel, end that connection before testing Shadowrocket on its own. Devices managed by a workplace or school may restrict VPN configurations. If you encounter a management restriction, contact the device administrator rather than repeatedly removing managed settings. Before deleting an existing VPN configuration, confirm which service it belongs to.
Keeping the connection switch on means the system connection process has advanced, but it does not prove that the selected server works. Connection status, server reachability, and access to a target page are three separate results to check. Next, use Connectivity Test and verify with real-world access; do not stop at “the switch is on.”
Step complete: A server is selected, required authorization is complete, and Home no longer shows a disconnected state. If the switch immediately turns off again, go to Troubleshooting.
STEP 04 · Check the actual result
Connectivity Test and connection verification
Start by running Connectivity Test on Home and checking whether the current test completes. The result reflects reachability for that test method and target; it does not mean every website is accessible, and a single number cannot determine real browsing speed. If the test times out, note the server, Global Routing mode, and network environment, keep the other conditions unchanged, and then compare results.
Next, switch to a browser and open a page you normally use and are authorized to access. Check that the page text, images, and required actions work. Opening a previously cached page is not enough to verify the current connection; refresh it or test another normally accessible page. If the browser works but one app does not, narrow the issue down to that app, the target domain, and its rules instead of assuming the entire connection has failed.
Check access and expected routing separately
When using Config, a page may open successfully because a DIRECT rule is in effect. To check routing, review the rule for that domain in the active Config and the app’s connection records to see which policy was used, then verify the selected server. Do not delete all working direct-connection rules just to prove that every request goes through a proxy; rule-based routing allows different requests to use different paths.
If results are unexpected in Config, temporarily switch to Proxy and test again with the same server and target. If Proxy works but Config does not, investigate rule matching, policy references, and related configuration. If both modes fail, check the server details and basic network connection first. Use Direct to check basic access, then restore the previous mode after the comparison.
Step complete: Real-world access matches expectations, and you can explain whether the current request uses a rule or a temporary proxy mode. Keep settings that work. Do not leave temporary changes to the mode, test method, or rules in an unknown state.
STEP 05 · Troubleshoot from the point of failure
Common issues and checks in Settings
Start troubleshooting at the earliest step that failed. If the subscription has not fetched successfully, address the subscription first. If the switch will not stay on, check authorization. If only some pages fail, check the rules and targets. This flow covers common first-time issues. For persistent DNS issues, battery drain, or problems after an update, continue with the complete troubleshooting guide.
The subscription is saved, but no records appear in SERVER
Return to the subscription editor and check URL. Make sure no parameters are missing, no spaces have been added, and you have not copied the service provider’s web page instead of the subscription URL. Then check that the device’s current network is working. A failed subscription fetch and a failed server connection are different stages; do not try to fix the former by changing Host or Port at random. If the URL has expired or returns data in an incompatible format, get a valid URL from your service provider and update it. Do not share the complete URL publicly.
The connection switch turns off, or the system reports a permission issue
Return to Home and try once more, checking whether the system is waiting for authorization to add a VPN configuration. Then check system VPN settings for conflicts or device management restrictions. If you denied permission by mistake, repeat the authorization process; reinstalling is not the first step. If you do need to reinstall, save your server details and configuration first so you do not lose unbacked-up information while troubleshooting.
The switch is on, but Connectivity Test times out
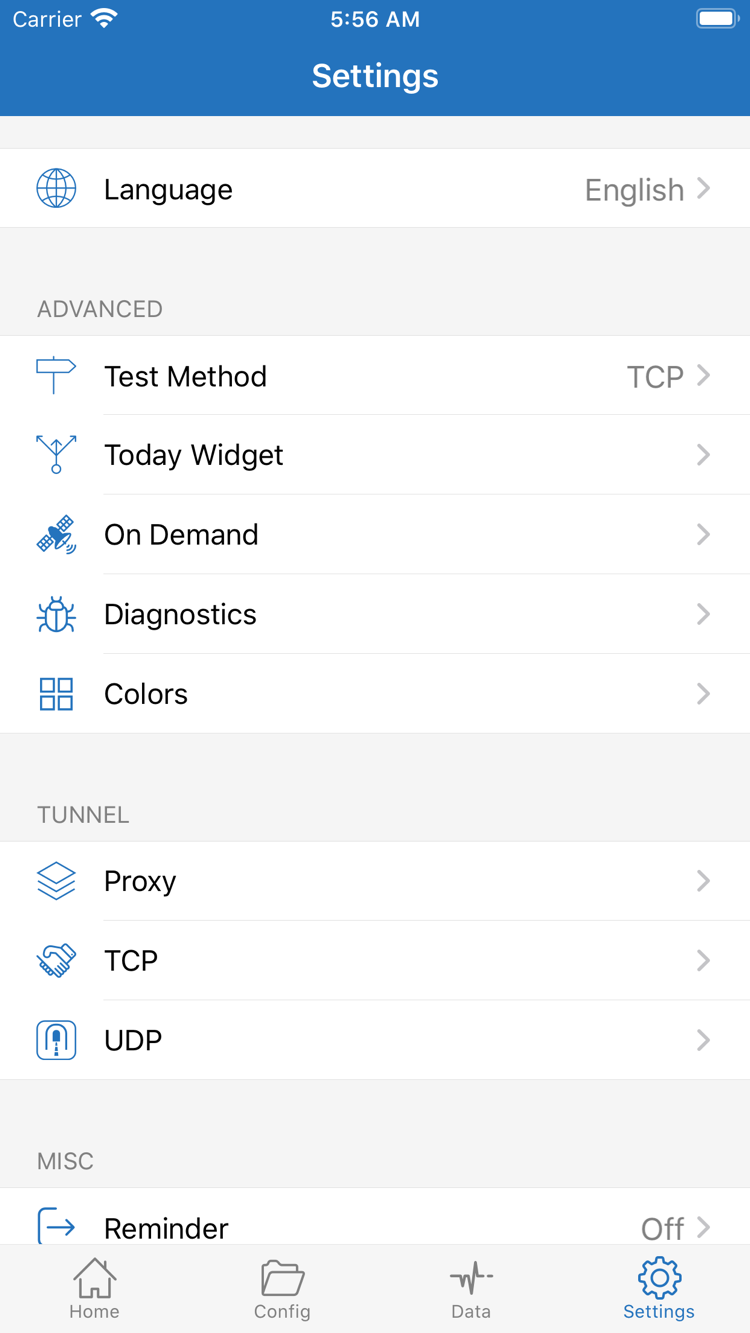
Check whether the selected server is still valid, then compare Type, Host, Port, authentication, and TLS parameters with the original information. Keep the server unchanged and test on another available basic network to distinguish a network environment issue from a server issue. Test Method in Settings affects how the test is run, so results from different methods are not directly comparable. Consider real-world access as well as a failed test.
Only some pages fail, or rules do not work as expected
First check that Global Routing is set to Config, then confirm which configuration file is active. Check whether an earlier DOMAIN, DOMAIN-SUFFIX, IP-CIDR, or other rule matches the target, and verify the final policy. If the main text loads but some resources fail, those resources may use other domains. Use connection records to investigate rather than assuming every request uses the single domain shown in the browser address bar.
How to handle On Demand and Diagnostics
On Demand in Settings can trigger a connection under configured conditions. Before verifying a manual connection, keep its trigger conditions simple; do not rely on automatic connections instead of basic testing. If it reconnects unexpectedly, review the On Demand conditions. Diagnostics can provide further clues, but do not change settings such as Proxy, TCP, or UDP one by one without a reason. Keep their original values and adjust only settings related to a confirmed symptom.
When reporting an issue to your service provider, include the failed step, error message, and comparisons you have already tried. Diagnostic records, QR codes, and subscription URLs may contain server addresses, authentication details, or personal access records. Hide sensitive information before sharing, and do not post screenshots containing complete credentials in public support requests.
When troubleshooting is complete: Restore Global Routing to your everyday mode and repeat the connection verification. If the issue remains, keep the smallest set of conditions that reproduces it and continue with the detailed guide for that symptom instead of repeating every import step.